
Introduction
With Katello & Foreman, you can install and configure the open source version of Red Hat Satellite, to manage an infrastructure, OS patching and configuration, etc.
Some practical information :
- Red Hat Satellite : is a system management solution that enables you to deploy, configure, and maintain your systems across physical, virtual, and cloud environments. Satellite provides provisioning, remote management and monitoring of multiple Red Hat Enterprise Linux deployments with a single, centralized tool.
- The Foreman : For provision and Life Cycle Management of physical and virtual systems.
- Katello : Foreman Plug-in for Subscription and Repository Management. (RHEL patching)
Note : Foreman and Katello are actually two of the components that make up Red Hat Satellite.
Prerequisites
For this lab, for testing purposes, we will use a virtual machine like the following :
OS : RHEL 7, CentOS 7 (64bits)
CPU : 2 minimum
RAM : 8 GB minimum
DISK : 140GB = 40GB(OS) + 100GB(/var/lib/pulp)
Note : /var/lib/pulp : Location to store the content to sync. The recommended minimum size should be 30GB for each Operating System we are about to Sync.
Installation of the Lab
Once we have the Linux CentOS 7 virtual machine ready, we go through the preparation to install Foreman, making some small configurations.
Set the hostname and add an entry in /etc/hosts :
# hostnamectl set-hostname "foremanlab.mylab.com"

# echo "10.79.94.99 foremanlab.mylab.com foremanlab" >> /etc/hosts
# hostnamectl status
   Static hostname: foremanlab.mylab.com
         Icon name: computer-vm
           Chassis: vm
        Machine ID: 7ad2153585ca450d80296226f31fe064
           Boot ID: b6fa901bb2eb4e28b36fb48198024bfc
    Virtualization: vmware
  Operating System: CentOS Linux 7 (Core)
       CPE OS Name: cpe:/o:centos:centos:7
            Kernel: Linux 3.10.0-1127.19.1.el7.x86_64
      Architecture: x86-64
# dnsdomainname -f
foremanlab.mylab.comUpdate the machine and reboot it :
# yum update -y ; rebootThe time synchronization for Foreman and Katello is really important. For that, we will install chrony, enable and start the service :
# yum install chrony
# systemctl enable chronyd
# systemctl start chronyd
# chronyc sources
Then, we must enable NTP synchronization :
# timedatectl set-ntp true
# timedatectl status
Firewall Requirement
The ports we must open in the Firewall on Foreman machine are :
TCP : 53, 80, 443, 5647, 9090
UDP : 67-69, 53
We just have to execute the following commands :
# firewall-cmd --add-port={53,80,443,5647,9090}/tcp --permanent
# firewall-cmd --add-port={67-69,53}/udp --permanent
# firewall-cmd --reload
# firewall-cmd --list-all
Note : If we plan to setup a DNS server in the same machine, it’s necessary to open port 53 UDP and TCP.
Storage Requirement
We need to have ready the filesystem /var/lib/pulp with 100 GB of space.
# df -h /var/lib/pulp
Filesystem                       Size  Used Avail Use% Mounted on
/dev/mapper/centos-var_lib_pulp  100G   33M  100G   1% /var/lib/pulp
Add Repositories
Check the current repositories :
# yum repolist
Loaded plugins: fastestmirror, langpacks
Loading mirror speeds from cached hostfile
 * base: centos.crazyfrogs.org
 * extras: ftp.pasteur.fr
 * updates: centos.crazyfrogs.org
repo id                                  	        repo name                                    status
base/7/x86_64                              CentOS-7 - Base                              10,070
extras/7/x86_64                            CentOS-7 - Extras                               413
updates/7/x86_64                         CentOS-7 - Updates                            1,134
repolist: 11,617
Add the required Repositories for the installation using yum :
# yum -y localinstall https://yum.theforeman.org/releases/2.3/el7/x86_64/foreman-release.rpm

https://yum.theforeman.org/releases/2.3/el7/x86_64/release-2.3.3-1.el7.noarch.rpm

# yum -y localinstall https://fedorapeople.org/groups/katello/releases/yum/3.18/katello/el7/x86_64/katello-repos-latest.rpm

# yum -y localinstall https://yum.puppet.com/puppet6-release-el-7.noarch.rpm

# yum -y localinstall https://dl.fedoraproject.org/pub/epel/epel-release-latest-7.noarch.rpm

# yum -y install epel-release centos-release-scl-rh
Install Foreman
# yum -y install foreman-installer
# yum -y update
Install Katello
# yum -y install katello
Setup Katello
Start to setup Katello by running foreman-installer.
While running foreman-installer we can use multiple options to set the admin User/Password.
Note : If the option “–scenario katello” is not used, it will set up with the puppet.
To set up with more modules it possible to add them by editing below YAML file. This should be done before starting with running foreman-installer :
# vim /etc/foreman-installer/scenarios.d/katello.yaml
In my setup, I have appended with postgresql, pulp, candlepin, qpid, tftp, dhcp and dns:
:order:
- certs
- foreman
- katello
- foreman_proxy
- foreman_proxy::plugin::pulp
- foreman_proxy_content
- puppet
- postgresql
- pulp
- candlepin
- qpid
- tftp
- dhcp
- dns
Enable true for required plugins by editing the below answer file.
For instance, to enable the ansible plugin, replace “false” with “true” –> foreman::plugin::ansible: true :
# vim /etc/foreman-installer/scenarios.d/katello-answers.yaml
foreman_proxy::plugin::pulp: true
foreman::plugin::ansible: true
foreman::plugin::azure: false
foreman::plugin::bootdisk: false
foreman::plugin::chef: false
foreman::plugin::default_hostgroup: false
foreman::plugin::digitalocean: false
foreman::plugin::discovery: false
foreman::plugin::expire_hosts: false
foreman::plugin::hooks: false
foreman::plugin::inventory_upload: false
foreman::plugin::kubevirt: false
foreman::plugin::memcache: false
foreman::plugin::monitoring: false
foreman::plugin::openscap: false
foreman::plugin::puppetdb: false
foreman::plugin::remote_execution: false
foreman::plugin::remote_execution::cockpit: false
foreman::plugin::salt: false
foreman::plugin::setup: false
foreman::plugin::snapshot_management: false
foreman::plugin::tasks: true
foreman::plugin::templates: false
foreman::plugin::virt_who_configure: false
foreman_proxy::plugin::ansible: false
foreman_proxy::plugin::chef: false
foreman_proxy::plugin::dhcp::infoblox: false
foreman_proxy::plugin::dhcp::remote_isc: false
foreman_proxy::plugin::discovery: false
foreman_proxy::plugin::dns::infoblox: false
foreman_proxy::plugin::monitoring: false
foreman_proxy::plugin::openscap: false
foreman_proxy::plugin::remote_execution::ssh: false
foreman_proxy::plugin::salt: false
foreman::compute::ec2: true
foreman::compute::gce: false
foreman::compute::libvirt: false
foreman::compute::openstack: false
foreman::compute::ovirt: false
foreman::compute::rackspace: false
foreman::compute::vmware: true
foreman::cli: true
foreman::cli::ansible: true
foreman::cli::azure: false
foreman::cli::discovery: false
foreman::cli::kubevirt: false
foreman::cli::openscap: false
foreman::cli::remote_execution: false
foreman::cli::tasks: false
foreman::cli::templates: false
foreman::cli::virt_who_configure: false
Install python-gofer :
# yum -y install python-gofer-qpidExecute foreman-installer with the following options to set up Katello :
# foreman-installer \
--scenario katello \
--foreman-initial-admin-username admin \
--foreman-initial-admin-password 'password'
Meanwhile, to monitor the installation progress check the log file with tail command :
# tail -f /var/log/foreman-installer/katello.log
Note : It took around 25 minutes to complete the Katello installation.
Preparing installation Done

  Success!
  * Katello is running at https://foremanlab.mylab.com
      Initial credentials are admin / password
  * To install an additional Foreman proxy on separate machine continue by running:
      foreman-proxy-certs-generate --foreman-proxy-fqdn "$FOREMAN_PROXY" --certs-tar "/root/$FOREMAN_PROXY-certs.tar"

  The full log is at /var/log/foreman-installer/katello.log
Once completed with the installation verify the service status :
# katello-service status | grep -i "Active"
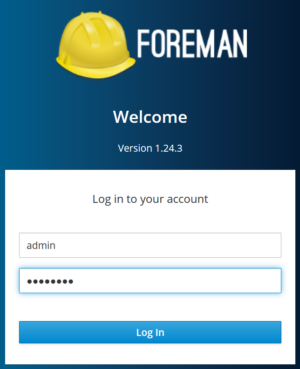
Accessing Foreman GUI
Access the foreman GUI using the FQDN url have you configured :
https://foremanlab.mylab.com
Once completed with the installation verify the service status :
# systemctl status foreman.service
# systemctl status foreman-proxy.service
Configure DHCP and DNS on Foreman-proxy :
Get oauth_consumer key and secret values :
# cat /etc/foreman/settings.yaml | grep oauth_
Configure the DHCP and DNS on foreman-proxy :
# foreman-installer --enable-foreman-proxy \
--foreman-proxy-tftp true \
--foreman-proxy-tftp-servername=10.79.204.102 \
--foreman-proxy-dhcp true \
--foreman-proxy-dhcp-interface "ens224" \
--foreman-proxy-dhcp-gateway "10.79.204.1" \
--foreman-proxy-dhcp-nameservers "10.79.204.102" \
--foreman-proxy-dhcp-range "10.79.204.160 10.79.204.170" \
--foreman-proxy-dhcp-server "10.79.204.102" \
--foreman-proxy-dns true \
--foreman-proxy-dns-forwarders "8.8.8.8; 4.4.4.4" \
--foreman-proxy-dns-interface "ens224" \
--foreman-proxy-dns-reverse "204.79.10.in-addr.arpa" \
--foreman-proxy-dns-server "10.79.204.102" \
--foreman-proxy-dns-zone "data.bluesoft-group.com" \
--foreman-oauth-consumer-key "PvQYpbBVB6RsMyAL7X6eBs686UPEYGqR" \
--foreman-oauth-consumer-secret "KGQaMurCGn4C5H4jK98qc8B256ca7YVL"